Installing a mini split system can be a great way to improve your home’s heating and cooling efficiency. For beginners, understanding the process step-by-step helps ensure a smooth installation and optimal performance. Before starting, it is essential to gather all necessary tools and materials, including the indoor unit, outdoor compressor, mounting brackets, copper refrigerant lines, electrical wiring, vacuum pump, and basic hand tools like drills and screwdrivers.
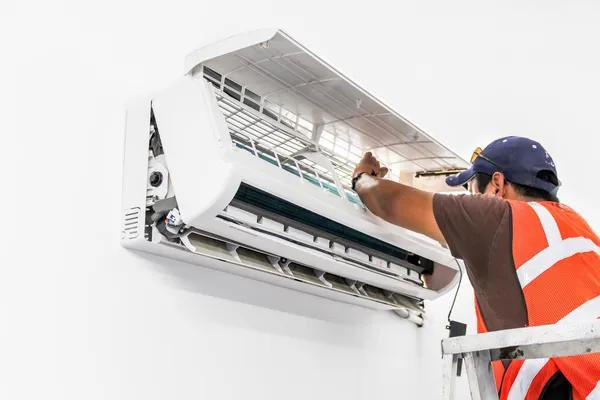
Begin by selecting an appropriate location for the indoor unit. It should be mounted high on an interior wall with enough clearance around it for airflow and maintenance access. Avoid placing it near heat sources or direct sunlight to maintain efficiency. Use the mounting bracket as a template to mark drilling points on the wall. Drill holes carefully and secure the bracket firmly using anchors if needed.
Next comes creating an opening through the wall for refrigerant lines and electrical cables. The hole should be slightly larger than the combined diameter of these lines to allow easy passage without damaging insulation or wiring. Insert a protective sleeve into this hole to prevent moisture intrusion or rodent entry.
Connecting refrigerant lines requires precise handling since they carry coolant between indoor and outdoor units. Carefully uncoil both copper tubes Mini Split without kinking them. Attach flare fittings at each end following manufacturer instructions; this usually involves tightening nuts securely but not overtightening which could cause leaks.
Mounting the outdoor compressor demands a solid base such as concrete pads or metal brackets fixed firmly outside your home in a well-ventilated area free from debris or obstructions that might restrict airflow around coils. Position it close enough so that refrigerant pipes reach comfortably but avoid excessive length which reduces system efficiency.
Once both units are secured in place with proper clearances maintained according to specifications provided by manufacturers, connect refrigerant lines between them ensuring tight seals at all joints using appropriate wrenches designed for flare fittings.
Electrical connections come next; always turn off power supply before working on wiring circuits involved in HVAC systems due to safety concerns. Connect power cables from your main breaker panel through disconnect boxes located near compressors then wire controls linking indoor thermostats with outdoor compressors following color codes indicated in manuals precisely.
Before turning on your system completely, evacuate air from refrigerant lines using a vacuum pump attached via service ports until pressure gauges show required vacuum levels indicating no moisture remains inside tubing preventing corrosion or blockages later during operation.
Finally, release refrigerants into sealed circuit either pre-charged within factory settings or added manually depending upon model requirements while monitoring pressures closely with gauges ensuring balance within recommended ranges given by manufacturer guidelines critical for efficient cooling/heating cycles throughout use seasons ahead.